venerdì 26 dicembre 2014

Stella in cartongesso gestita da Smartphone

Ho creato una stella in cartongesso al posto del vecchio lampadario in soggiorno.


Poi ho montato dei faretti e con Arduino, un modulo bluetooth, un modulo relè e infine un app creata da me (per android) ho creato un comando remoto per accendere e spegnere ogni singolo faretto comodamente dal divano o qualsiasi altro posto purchè nel raggio del modulo bluetooth.
Potete avere l'app gratuitamente contattandomi e ve la manderò in qualche modo.

Collegamenti:

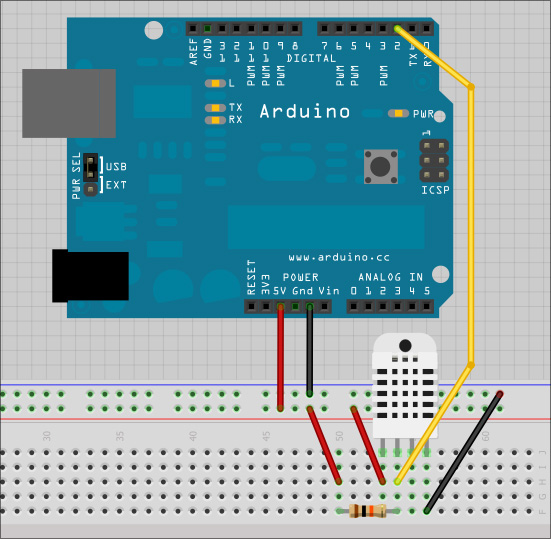
Modulo bluetooth hc-06 all'arduino connettendo RX al TX e il TX all'RX.
Modulo relè alle uscite di arduino 4, 5, 6, 7, 8.

Codice Arduino: Version 1.0 (stabile e testata)


#include <SoftwareSerial.h>
#include <EEPROM.h>

SoftwareSerial mySerial(2,3); //RX, TX
char val;

int luce1 = 4;
int luce2 = 5;
int luce3 = 6;
int luce4 = 7;
int luce5 = 8;
int Step;

boolean s1 = false;
boolean s2 = false;
boolean s3 = false;
boolean s4 = false;
boolean s5 = false;

byte datoeeprom1;
byte datoeeprom2;
byte datoeeprom3;
byte datoeeprom4;
byte datoeeprom5;

boolean passo = false;

long unsigned int time = millis();
int intervallo = 200; //valore base = 150, aumentare se si è lenti a passare da un tasto all'altro del telecomando
  
void setup() {
  Serial.begin(9600);      // Inizializza la comunicazione seriale a 9600bps
  mySerial.begin(9600);
  
  pinMode(luce1, OUTPUT);
  pinMode(luce2, OUTPUT);
  pinMode(luce3, OUTPUT);
  pinMode(luce4, OUTPUT);
  pinMode(luce5, OUTPUT);
  
  
  Serial.println("output fatto");
  
  
  //carico valore memoria e accendo/spengo vari relè
  datoeeprom1 = EEPROM.read(1); 
  datoeeprom2 = EEPROM.read(2); 
  datoeeprom3 = EEPROM.read(3); 
  datoeeprom4 = EEPROM.read(4); 
  datoeeprom5 = EEPROM.read(5); 

  Serial.println("leggo dati dalla eproom");
  Serial.println(datoeeprom1);
  Serial.println("1 fatto, ora il secondo:");
 Serial.println(datoeeprom2);

  if (datoeeprom1 == 1)
  {
    digitalWrite(luce1, HIGH);
  }else{
    digitalWrite(luce1, LOW);
  }
  
  if (datoeeprom2 == 1)
  {
    digitalWrite(luce2, HIGH);
  }else{
    digitalWrite(luce2, LOW);
  }
  
  if (datoeeprom3 == 1)
  {
    digitalWrite(luce3, HIGH);
  }else{
    digitalWrite(luce3, LOW);
  }
  
  if (datoeeprom4 == 1)
  {
    digitalWrite(luce4, HIGH);
  }else{
    digitalWrite(luce4, LOW);
  }
  
  if (datoeeprom5 == 1)
  {
    digitalWrite(luce5, HIGH);
  }else{
    digitalWrite(luce5, LOW);
  }


}
void loop() {
  riceviValori();
  
  if (val == '1')
  {
    if (s1 == true){
      digitalWrite(luce1, LOW);
      Serial.println("funzia");
      EEPROM.write(1, 0);
      s1 = false;
    }
    else{
      digitalWrite(luce1, HIGH);
      EEPROM.write(1, 1);
      s1 = true;
    }
  }
  
  if( val == '2' )
  {
    if (s2 == true){
      digitalWrite(luce2, LOW);
      EEPROM.write(2, 0);
      s2 = false;
    }
    else{
      digitalWrite(luce2, HIGH);
      EEPROM.write(2, 1);
    s2 = true;
    }
  }
  
  if( val == '3' )
  {
    if (s3 == true){
      digitalWrite(luce3, LOW);
      EEPROM.write(3, 0);
      s3 = false;
    }
    else{
      digitalWrite(luce3, HIGH);
      EEPROM.write(3, 1);
      s3 = true;
    }
  }
  
  if( val == '4' )
  {
    if (s4 == true){
      digitalWrite(luce4, LOW);
      EEPROM.write(4, 0);
      s4 = false;
    }
    else{
      digitalWrite(luce4, HIGH);
      EEPROM.write(4, 1);
      s4 = true;
    }
  }
  
  if( val == '5' )
  {
    if (s5 == true){
      digitalWrite(luce5, LOW);
      EEPROM.write(5, 0);
      s5 = false;
    }
    else{
      digitalWrite(luce5, HIGH);
      EEPROM.write(5, 1);
      s5 = true;
    }
  }
  
  if( val == 'P' ) //PULSANTE PIù
  {
    intervallo = intervallo + 100;
  }
  
  if( val == 'M' ) //PULSANTE MENO
  {
    intervallo = intervallo - 100;
  }
  
  if( val == 'S' ) //PULSANTE SEQUENZA
  {
    if (passo == true)
    {
      passo = false;
    }
    else{
      passo = true;
      digitalWrite(luce1, LOW);
      digitalWrite(luce2, LOW);
      digitalWrite(luce3, LOW);
      digitalWrite(luce4, LOW);
      digitalWrite(luce5, LOW);
      funzioneStep();
    }
  }
  delay(100); // attende 100ms per la prossima lettura
}

void riceviValori(){
  val = mySerial.read();   // legge il valore e lo salva nella variabile 'val'
  
}

void funzioneStep(){
  switch (Step)
  {
   /* case 1:
      if (bottonepremuto!=0)
      {

      }  
      break;
    case 2:*/
  }
}

domenica 21 dicembre 2014

Utilizzare sensore temperatura e umidità

Ho comprato su ebay un sensore DHT22 che misura temperature da -40°C a 125°C e umidità da 0% a 100%. Il DHT11 misura da 0°C a 50°C e umidità da 20% a 80%.
Ho fatto davvero fatica a trovare uno sketch e una libreria che funzionassero con questo componente ma alla fine dopo ore di ricerche ce l'ho fatta!

Per le librerie, create una cartella di nome DHT e schiaffateci dentro i file "DHT.cpp" e "DHT.h", e schiaffate il tutto nella cartella delle librerie di Arduino, poi installate le librerie (sketch --> importa libreria... --> aggiungi librerie...)

Collegamenti:
dht22-arduino
Resistenza da 1Kohm
Alimentazione 3,3 V oppure 5V

File "DHT.cpp"


/******************************************************************
  DHT Temperature & Humidity Sensor library for Arduino.
  Features:
  - Support for DHT11 and DHT22/AM2302/RHT03
  - Auto detect sensor model
  - Very low memory footprint
  - Very small code
  http://www.github.com/markruys/arduino-DHT
  Written by Mark Ruys, mark@paracas.nl.
  BSD license, check license.txt for more information.
  All text above must be included in any redistribution.
  Datasheets:
  - http://www.micro4you.com/files/sensor/DHT11.pdf
  - http://www.adafruit.com/datasheets/DHT22.pdf
  - http://dlnmh9ip6v2uc.cloudfront.net/datasheets/Sensors/Weather/RHT03.pdf
  - http://meteobox.tk/files/AM2302.pdf
  Changelog:
   2013-06-10: Initial version
   2013-06-12: Refactored code
   2013-07-01: Add a resetTimer method
 ******************************************************************/

#include "DHT.h"

void DHT::setup(uint8_t pin, DHT_MODEL_t model)
{
  DHT::pin = pin;
  DHT::model = model;
  DHT::resetTimer(); // Make sure we do read the sensor in the next readSensor()

  if ( model == AUTO_DETECT) {
    DHT::model = DHT22;
    readSensor();
    if ( error == ERROR_TIMEOUT ) {
      DHT::model = DHT11;
      // Warning: in case we auto detect a DHT11, you should wait at least 1000 msec
      // before your first read request. Otherwise you will get a time out error.
    }
  }
}

void DHT::resetTimer()
{
  DHT::lastReadTime = millis() - 3000;
}

float DHT::getHumidity()
{
  readSensor();
  return humidity;
}

float DHT::getTemperature()
{
  readSensor();
  return temperature;
}

#ifndef OPTIMIZE_SRAM_SIZE

const char* DHT::getStatusString()
{
  switch ( error ) {
    case DHT::ERROR_TIMEOUT:
      return "TIMEOUT";

    case DHT::ERROR_CHECKSUM:
      return "CHECKSUM";

    default:
      return "OK";
  }
}

#else

// At the expense of 26 bytes of extra PROGMEM, we save 11 bytes of
// SRAM by using the following method:

prog_char P_OK[]       PROGMEM = "OK";
prog_char P_TIMEOUT[]  PROGMEM = "TIMEOUT";
prog_char P_CHECKSUM[] PROGMEM = "CHECKSUM";

const char *DHT::getStatusString() {
  prog_char *c;
  switch ( error ) {
    case DHT::ERROR_CHECKSUM:
      c = P_CHECKSUM; break;

    case DHT::ERROR_TIMEOUT:
      c = P_TIMEOUT; break;

    default:
      c = P_OK; break;
  }

  static char buffer[9];
  strcpy_P(buffer, c);

  return buffer;
}

#endif

void DHT::readSensor()
{
  // Make sure we don't poll the sensor too often
  // - Max sample rate DHT11 is 1 Hz   (duty cicle 1000 ms)
  // - Max sample rate DHT22 is 0.5 Hz (duty cicle 2000 ms)
  unsigned long startTime = millis();
  if ( (unsigned long)(startTime - lastReadTime) < (model == DHT11 ? 999L : 1999L) ) {
    return;
  }
  lastReadTime = startTime;

  temperature = NAN;
  humidity = NAN;

  // Request sample

  digitalWrite(pin, LOW); // Send start signal
  pinMode(pin, OUTPUT);
  if ( model == DHT11 ) {
    delay(18);
  }
  else {
    // This will fail for a DHT11 - that's how we can detect such a device
    delayMicroseconds(800);
  }

  pinMode(pin, INPUT);
  digitalWrite(pin, HIGH); // Switch bus to receive data

  // We're going to read 83 edges:
  // - First a FALLING, RISING, and FALLING edge for the start bit
  // - Then 40 bits: RISING and then a FALLING edge per bit
  // To keep our code simple, we accept any HIGH or LOW reading if it's max 85 usecs long

  word rawHumidity;
  word rawTemperature;
  word data;

  for ( int8_t i = -3 ; i < 2 * 40; i++ ) {
    byte age;
    startTime = micros();

    do {
      age = (unsigned long)(micros() - startTime);
      if ( age > 90 ) {
        error = ERROR_TIMEOUT;
        return;
      }
    }
    while ( digitalRead(pin) == (i & 1) ? HIGH : LOW );

    if ( i >= 0 && (i & 1) ) {
      // Now we are being fed our 40 bits
      data <<= 1;

      // A zero max 30 usecs, a one at least 68 usecs.
      if ( age > 30 ) {
        data |= 1; // we got a one
      }
    }

    switch ( i ) {
      case 31:
        rawHumidity = data;
        break;
      case 63:
        rawTemperature = data;
        data = 0;
        break;
    }
  }

  // Verify checksum

  if ( (byte)(((byte)rawHumidity) + (rawHumidity >> 8) + ((byte)rawTemperature) + (rawTemperature >> 8)) != data ) {
    error = ERROR_CHECKSUM;
    return;
  }

  // Store readings

  if ( model == DHT11 ) {
    humidity = rawHumidity >> 8;
    temperature = rawTemperature >> 8;
  }
  else {
    humidity = rawHumidity * 0.1;

    if ( rawTemperature & 0x8000 ) {
      rawTemperature = -(int16_t)(rawTemperature & 0x7FFF);
    }
    temperature = ((int16_t)rawTemperature) * 0.1;
  }

  error = ERROR_NONE;
}

File  "DHT.h"

/******************************************************************
  DHT Temperature & Humidity Sensor library for Arduino.
  Features:
  - Support for DHT11 and DHT22/AM2302/RHT03
  - Auto detect sensor model
  - Very low memory footprint
  - Very small code
  http://www.github.com/markruys/arduino-DHT
  Written by Mark Ruys, mark@paracas.nl.
  BSD license, check license.txt for more information.
  All text above must be included in any redistribution.
  Datasheets:
  - http://www.micro4you.com/files/sensor/DHT11.pdf
  - http://www.adafruit.com/datasheets/DHT22.pdf
  - http://dlnmh9ip6v2uc.cloudfront.net/datasheets/Sensors/Weather/RHT03.pdf
  - http://meteobox.tk/files/AM2302.pdf
  Changelog:
   2013-06-10: Initial version
   2013-06-12: Refactored code
   2013-07-01: Add a resetTimer method
 ******************************************************************/

#ifndef dht_h
#define dht_h

#if ARDUINO < 100
  #include <WProgram.h>
#else
  #include <Arduino.h>
#endif

class DHT
{
public:

  typedef enum {
    AUTO_DETECT,
    DHT11,
    DHT22,
    AM2302,  // Packaged DHT22
    RHT03    // Equivalent to DHT22
  }
  DHT_MODEL_t;

  typedef enum {
    ERROR_NONE = 0,
    ERROR_TIMEOUT,
    ERROR_CHECKSUM
  }
  DHT_ERROR_t;

  void setup(uint8_t pin, DHT_MODEL_t model=AUTO_DETECT);
  void resetTimer();

  float getTemperature();
  float getHumidity();

  DHT_ERROR_t getStatus() { return error; };
  const char* getStatusString();

  DHT_MODEL_t getModel() { return model; }

  int getMinimumSamplingPeriod() { return model == DHT11 ? 1000 : 2000; }

  int8_t getNumberOfDecimalsTemperature() { return model == DHT11 ? 0 : 1; };
  int8_t getLowerBoundTemperature() { return model == DHT11 ? 0 : -40; };
  int8_t getUpperBoundTemperature() { return model == DHT11 ? 50 : 125; };

  int8_t getNumberOfDecimalsHumidity() { return 0; };
  int8_t getLowerBoundHumidity() { return model == DHT11 ? 20 : 0; };
  int8_t getUpperBoundHumidity() { return model == DHT11 ? 90 : 100; };

  static float toFahrenheit(float fromCelcius) { return 1.8 * fromCelcius + 32.0; };
  static float toCelsius(float fromFahrenheit) { return (fromFahrenheit - 32.0) / 1.8; };

protected:
  void readSensor();

  float temperature;
  float humidity;

  uint8_t pin;

private:
  DHT_MODEL_t model;
  DHT_ERROR_t error;
  unsigned long lastReadTime;
};

#endif /*dht_h*/


SKETCH:

#include "DHT.h"          // DHT & AM2302 library

// Version number
const float fVerNum = 0.03;

// Data pin connected to AM2302
#define DHTPIN 2

#define DHTTYPE DHT22       // DHT 22  (AM2302)

DHT dht(DHTPIN, DHTTYPE);   // LED pins

//////////////////////////////////////////////////////
//
// SETUP
//
void setup() {
  // Setup serial monitor
  Serial.begin(9600);
  
  // Wait 3 seconds
  delay(3000);
  
  Serial.println(F("\nAM2302 Sensor"));
  Serial.print(F("Version : "));
  Serial.println(fVerNum);
  Serial.println(F("Arduino - Derek Erb\n"));
  delay(5000);
  
  dht.begin();
}
  

void loop() {
  
  // Reading temperature or humidity takes about 250 milliseconds!
  // Sensor readings may also be up to 2 seconds 'old' (its a very slow sensor)
  float h = dht.readHumidity();
  float t = dht.readTemperature();

  // check if returns are valid, if they are NaN (not a number) then something went wrong!
  if (isnan(t) || isnan(h)) {
    Serial.println(F("Failed to read from DHT"));
  }
  else {
    Serial.print(F("Humidity: ")); 
    Serial.print(h);
    Serial.print(F(" %\t"));
    Serial.print(F("Temperature: ")); 
    Serial.print(t);
    Serial.println(F(" C"));
  }
  
  // Wait 3 seconds
  delay(3000);
}

sabato 20 dicembre 2014

Telecomando che impara nuovi codici (in corso)

Telecomando che impara nuovi codici:


Con questo progetto vorrei realizzare un progetto che acquisisca nuovi comandi per televisori e li memorizzi nella eprom, li associ a dei tasti e li possa inviare quando richiesto.

Occorrente:

Arduino, led TX, led RX, schermo lcd 1602, bottoni.
Librerie: IRremote, Menubackend.


Collegamenti del mio ricevitore IR visto di fronte:

Pin a sinistra: dati
Pin al centro: GND
Pin a destra: Vcc

Codice Arduino per ricevere e memorizzare codici infrarossi nella Eproom:


#in corso di Scrittura...


Nel monitor seriale dovremmo vedere codici come questi premendo i tasti del telecomando:

Unknown encoding: 731A3E02(32 bits)
#define Something_DEC 1931099650
#define Something_HEX 731A3E02
Raw (68): -6650 4500 -4450 550 -1700 500 -1700 550 -1700 500 -600 550 -550 550 -600 500 -600 500 -600 550 -1700 500 -1700 550 -1650 550 -600 500 -600 550 -550 550 -550 600 -550 550 -1650 550 -550 600 -550 550 -1650 550 -550 600 -550 550 -550 550 -550 550 -550 600 -1650 600 -1600 600 -550 550 -1650 600 -1650 550 -1650 600 -1650 550


Qui il codice per attivare l'uscita ricevuto il nostro DETERMINATO codice IR (aggiungiamo semplicemente "0x" al codice esadecimale):

Accendiamo un led

Prima di progettare qualunque cosa...

Prima di mettere le mani su Arduino dobbiamo sapere cosa non fare:


  1. Non fare mai cortocircuitare i pin di input/output con ground o cortocircuitare i pin tra di loro, ad esempio collegando un led senza la sua resistenza da 300/400 ohm.
  2. Non dare una tensione superiore a 5V ai pin di input/output o al pin 5V che alimenta arduino, per alimentarlo con tensioni superiori esiste l'apposito pin Vin
  3. Non applicare una tensione superiore a 3,3V sul pin 3,3V
  4. Non cortocircuitare Vin e ground
  5. Non prelevare più di 20mA da ogni singolo pin di input/output e più di 200mA totali dai pin input/output

Che cos'è Arduino?

Che cos'è Arduino?

Arduino è una scheda elettronica contenente un microprocessore programmabile dal computer, per creare dispositivi che variano dal semplice gioco di luci, a una stampante 3D, per creare una centralina di irrigazione, una macchina telecomandata dal cellulare e qualsiasi altra cosa vi può venire in mente. Si possono collegare ad Arduino sensori di luminosità, temperatura, umidità, peso, e molti altri, si può creare quasi qualsiasi cosa vi venga in mente!